Skills For Doing Quilting Patchwork

patch work

Have you got some patchwork to do so that you can get a good quilt? It is not a difficult task anymore. There are some ways that can help you to know about doing a patchwork quilting. The first steps before you make a quilt are Cutting, then piecing, after that pressing and the last, squaring.

The first and the main step are cutting. Use a rotary cutter other than a fabric cutter, then a cutting mat and a good quilting ruler. Quilting rulers are of great help. You can see an extra ½’’ built in many quilting rulers. To cut the quilting fabric, the first thing you need to do is to place the quilt ruler correctly on the fabric. Use your non-dominant hand to hold the ruler and hold the rotary cutter with your dominant hand. Push the cutter against the ruler, then down to the fabric. Once you get familiar with this process, you can easily get your fabrics in the shape you want.

patchwork1

The next step is piecing the fabrics. You should get all the blocks or pieces in the same length otherwise; you will not get even edges for the pieces and then it will create difficulties in quilting. You might have to adjust the needle width, depending on your machine alignment. This process can help you get a correct ¼’’seam. An incorrect seam can cause issues later when you try to line up rows of blocks.

Never skip the step pressing. Pressing makes sure of accurate seams and the making of your quilt lie flat. Pressing is not ironing. In this, we do not run the iron around the fabric as it will result in stretching the fabric. Once pressing is over, you need to start trimming the small strips of the excess fabrics that have fallen out of the original size of the block. To get all these skills, you need to practice and then perform.

Read also – Free- Motion Quilting – Tips For Beginners
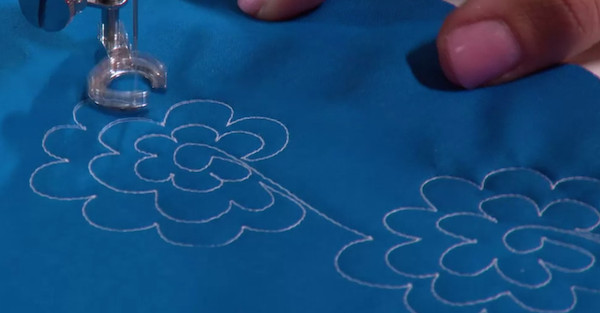
Free- Motion Quilting – Tips For Beginners

motion quilting

Is adding a good look to your quilts, a dream for you? If it is, then there are simple ways to acquire it. Here are some tips for successful quilting which you can do on your home machine.

The first thing is finding ample table surface area for quilting. On a domestic machine, if you could have a drop-in table, that will be good for free-motion quilting. If you do not have one, there is no need to worry. Get a table that is long enough to keep the things, and that can be within your reach.

Now, if you are using a sewing machine, you should keep the threads handy. To get rid of any difficulties like the needle thread gets poke through the back side, you should use a thread that matches the color of your machine’s top and bobbin. The next thing to keep in mind is you can use different colors of fabric paints so that you can get attention on the texture and not on any mistakes. Do not start working on big projects in the beginning. You should practice on small projects or scraps first so that you can get the confidence to work on a big project. When you practice, you can try a different combination of colors and different patterns.

Get all the blocks and pieces cut by you. If someone else does the job for you, you will not get satisfaction which can affect the work. The best thing you can do is do the quilt yourself. By doing this, you will be getting practice so that you can avoid any mistakes in the future. Start selecting a simple quilting design to work first. Always have a plan before you start quilting. You can draw the design or write down step by step activities which need to be complete while quilting. This plan can help in getting you a good result.

The Solutions For A Perfect Quilter’s Knot

Easy_Threading

There are different kinds of knots that people use. Like the Slipknot, the tailor’s knot, English knot, etc. the basic and the versatile knot is the quilter’s knot. Not to forget, it is one of the least knots that people use. Here is the information about how to make a quilter’s knot and when you can use it.

Some people say that tailor’s knot and quilter’s knot are the same. Some say they are different. Some say that a tailor’s knot is done by putting two knots at the end of the thread and it will not slip through the layers of fabric. On the other hand, a quilter’s knot is tiny knots that slip or pull through the fabric so that no one can see the knot. All depend on selecting the correct knot.
Quilter’s Knot is very much straightforward and easy to understand. You need to use your dominant hand to hold the needle. Then pass the thread to the needle using your dominant hand. Once the thread gets through the needle, pull the thread and using your forefinger you can make a knot at the end of the needle. You can decide on how many knots you want to put in that thread.

When you decide to start sewing, a quilter’s knot will help you in hand sewing. Once you get familiarize with putting quilter’s knot, you can start sewing small clothes or start stitching on scraps. Do not use quilter’s knots for major stitching as it can create difficulties for you if you do not have enough practice in stitching clothes. The more you practice, the more you can get professionalism in stitching. Once you get confidence by practicing stitching regularly, you can try to do big projects. Do not do big projects without proper practicing as it can cause you a lot of difficulties.